Hey everyone, welcome back to The Ham Radio Lab!
So I have a confession to share. I have my radio operators license plate on my Ford Bronco, but I don’t have a radio installed in it. When I have gone on road trips, I’ve used a MFJ SMA window mount with some coax to one of my HT’s. Not the greatest solution but it sort of worked, mostly.
But when I brought home my 2022 Ford Bronco, I knew it had to have a radio or to be honest, radios, installed so that I would never be without comm’s no matter where my adventures took me. If you’ve spent any time looking at the 6th Generation Bronco interior, you know that finding space for a full-sized dual-band mobile radio can be a bit of a puzzle.
Today, I’m taking you step-by-step through how I installed the Yaesu FTM-500DR VHF/UHF radio into my Bronco. This setup gives me solid trail communications, a clean interior look, and a very cool, quick-disconnect modular security feature perfect for when the doors and top come off!
The Build Strategy & Component List
I wanted an install that was rugged enough for overlanding, cosmetically clean, and free of electrical noise and easy to stow away when my wife would ride with me in the Bronco. So I focused on some basics:
- Transceiver: Yaesu FTM-510DR Dual-Band Mobile Radio with separation cable
- Antenna: Comet SBB-5 NMO Dual Band Antenna
- Mounting Solutions:
- Antenna: Fender No-Drill NMO Mount
- Control Head: LIDO Mount with AMP Attachment
- Bronco-specific TackForm Grab Handle Mount with Telescopic Arm
- Wiring & Extras: 12-gauge Powerwerx zip cord, inline waterproof fuse holders, Anderson Powerpoles, and a hidden RJ45 bulkhead dashboard connector.
Phase 1: Clean Power, Clean Signal (The Engine Bay)
Modern vehicles are rolling computers, and the Bronco is no exception. To prevent pesky alternator whine and electrical interference from showing up on my transmissions, I bypassed the vehicle’s internal fuse boxes entirely. So I ran heavy-duty 12-gauge Powerwerx wire directly to the battery’s positive terminal and the main vehicle ground. I used a waterproof inline fuse holder on both the positive and negative runs as close to the battery as possible. This ensures that if the line ever rubs or shorts out along the firewall, the circuit opens immediately before causing a fire hazard.
Passing the Firewall: Thankfully Ford built the Bronco with upgrades and customizations in mind so there are a number of places where there are bulkhead holes with grommets available to pass wires from the engine bay into the passenger compartment. Running the power feed into the passenger compartment along with the antenna connection zip-tying it cleanly away from high-heat engine components.
The last part was removing the interior panels inside the drivers side compartment to route the wires to underneath the drivers seat where I was planning to mount the actual radio body. While routing the power and antenna wire, I routed the separation cable from the radio in reverse to the the back of the center console.
Phase 2: Stealth Base Unit Placement
I had multiple options for the radio body, there’s a radio mount for under the dash on both the drivers side and even behind the glove box on the passengers side. Heck there is even a lot of room underneath the center console. However, the FTM-510 is just a little to wide and thick to fit in these locations so the main RF deck/body of the Yaesu FTM-510DR is mounted securely under the driver’s seat. This keeps the heavy base unit out of sight, protected from the elements, and allows for short, direct cable runs. I terminated the power lines with Anderson Powerpoles under the seat for a secure, easily modifiable connection.
Phase 3: The Modular Dash & Control Head
This is where the install gets unique. When you drop the top on a Bronco, vehicle security becomes a top priority. I didn’t want a bright color touch screen sitting on my dash screaming for attention when parked at a trailhead or grocery store.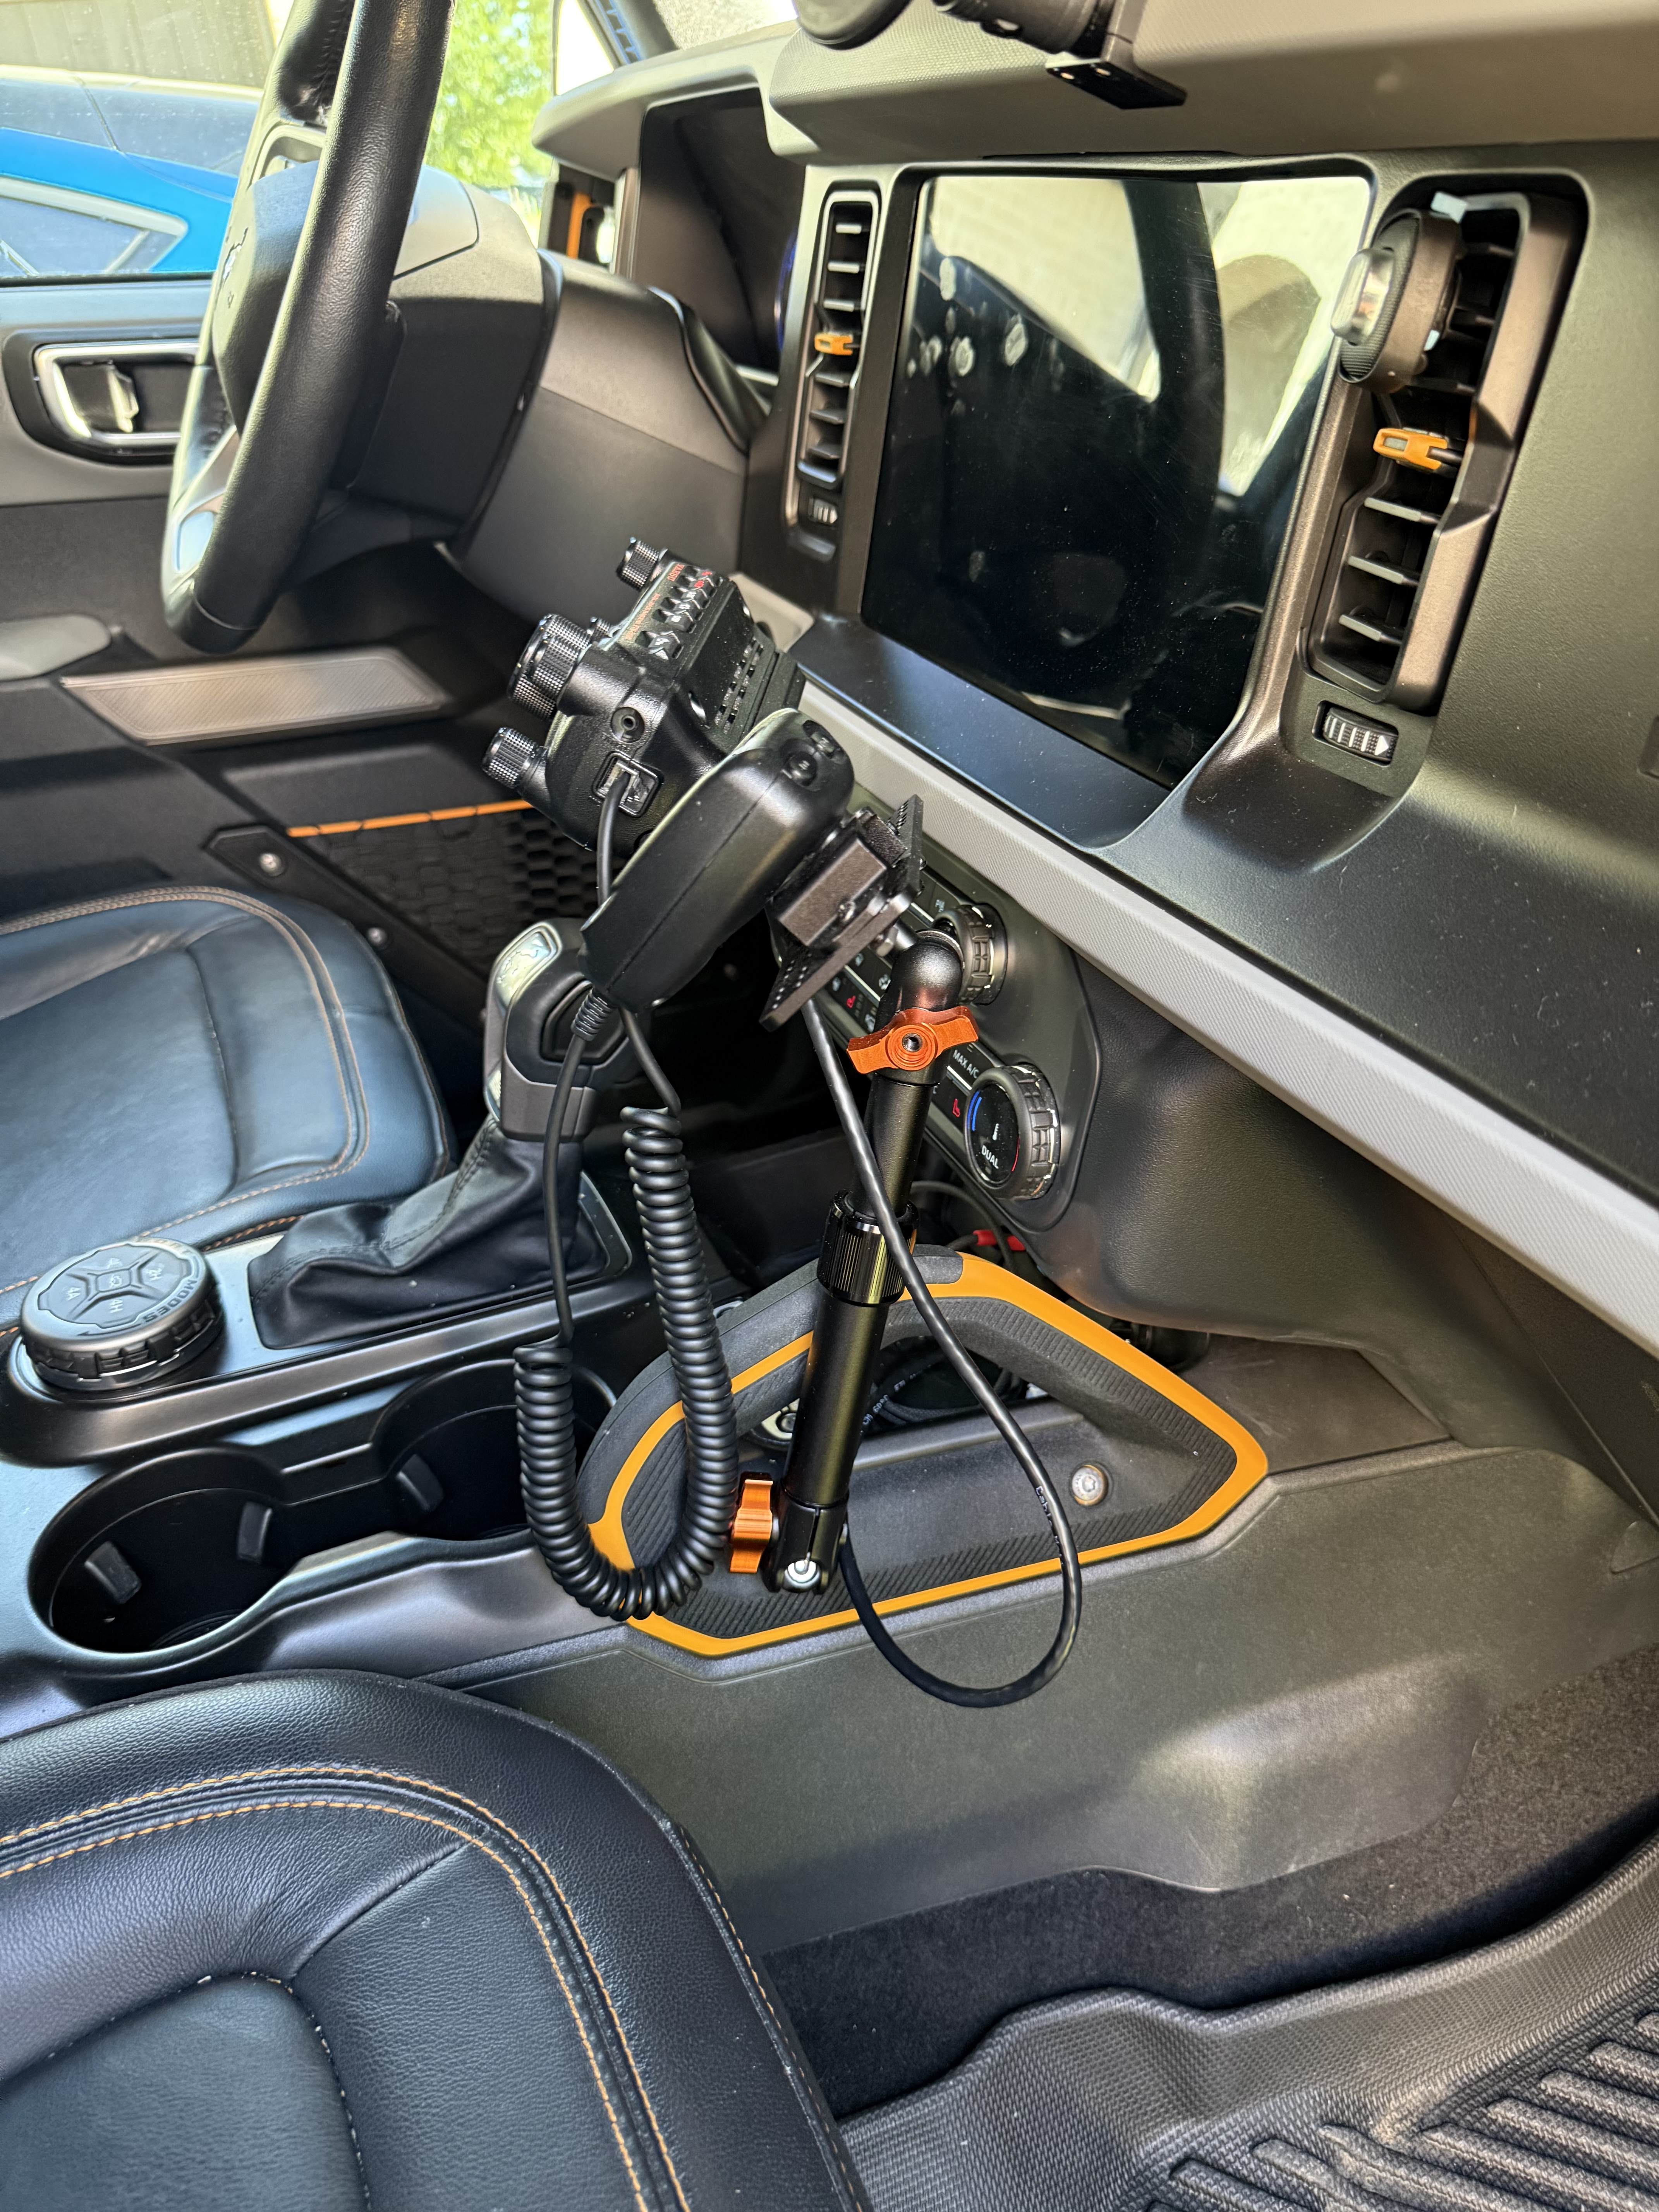
The Mount: I utilized the Tackform Grab Handle Telescoping Mount combined with the LIDO radio head mount which lets me adjust the screen up, down, or angled toward the passenger seat if my co-pilot is logging contacts.
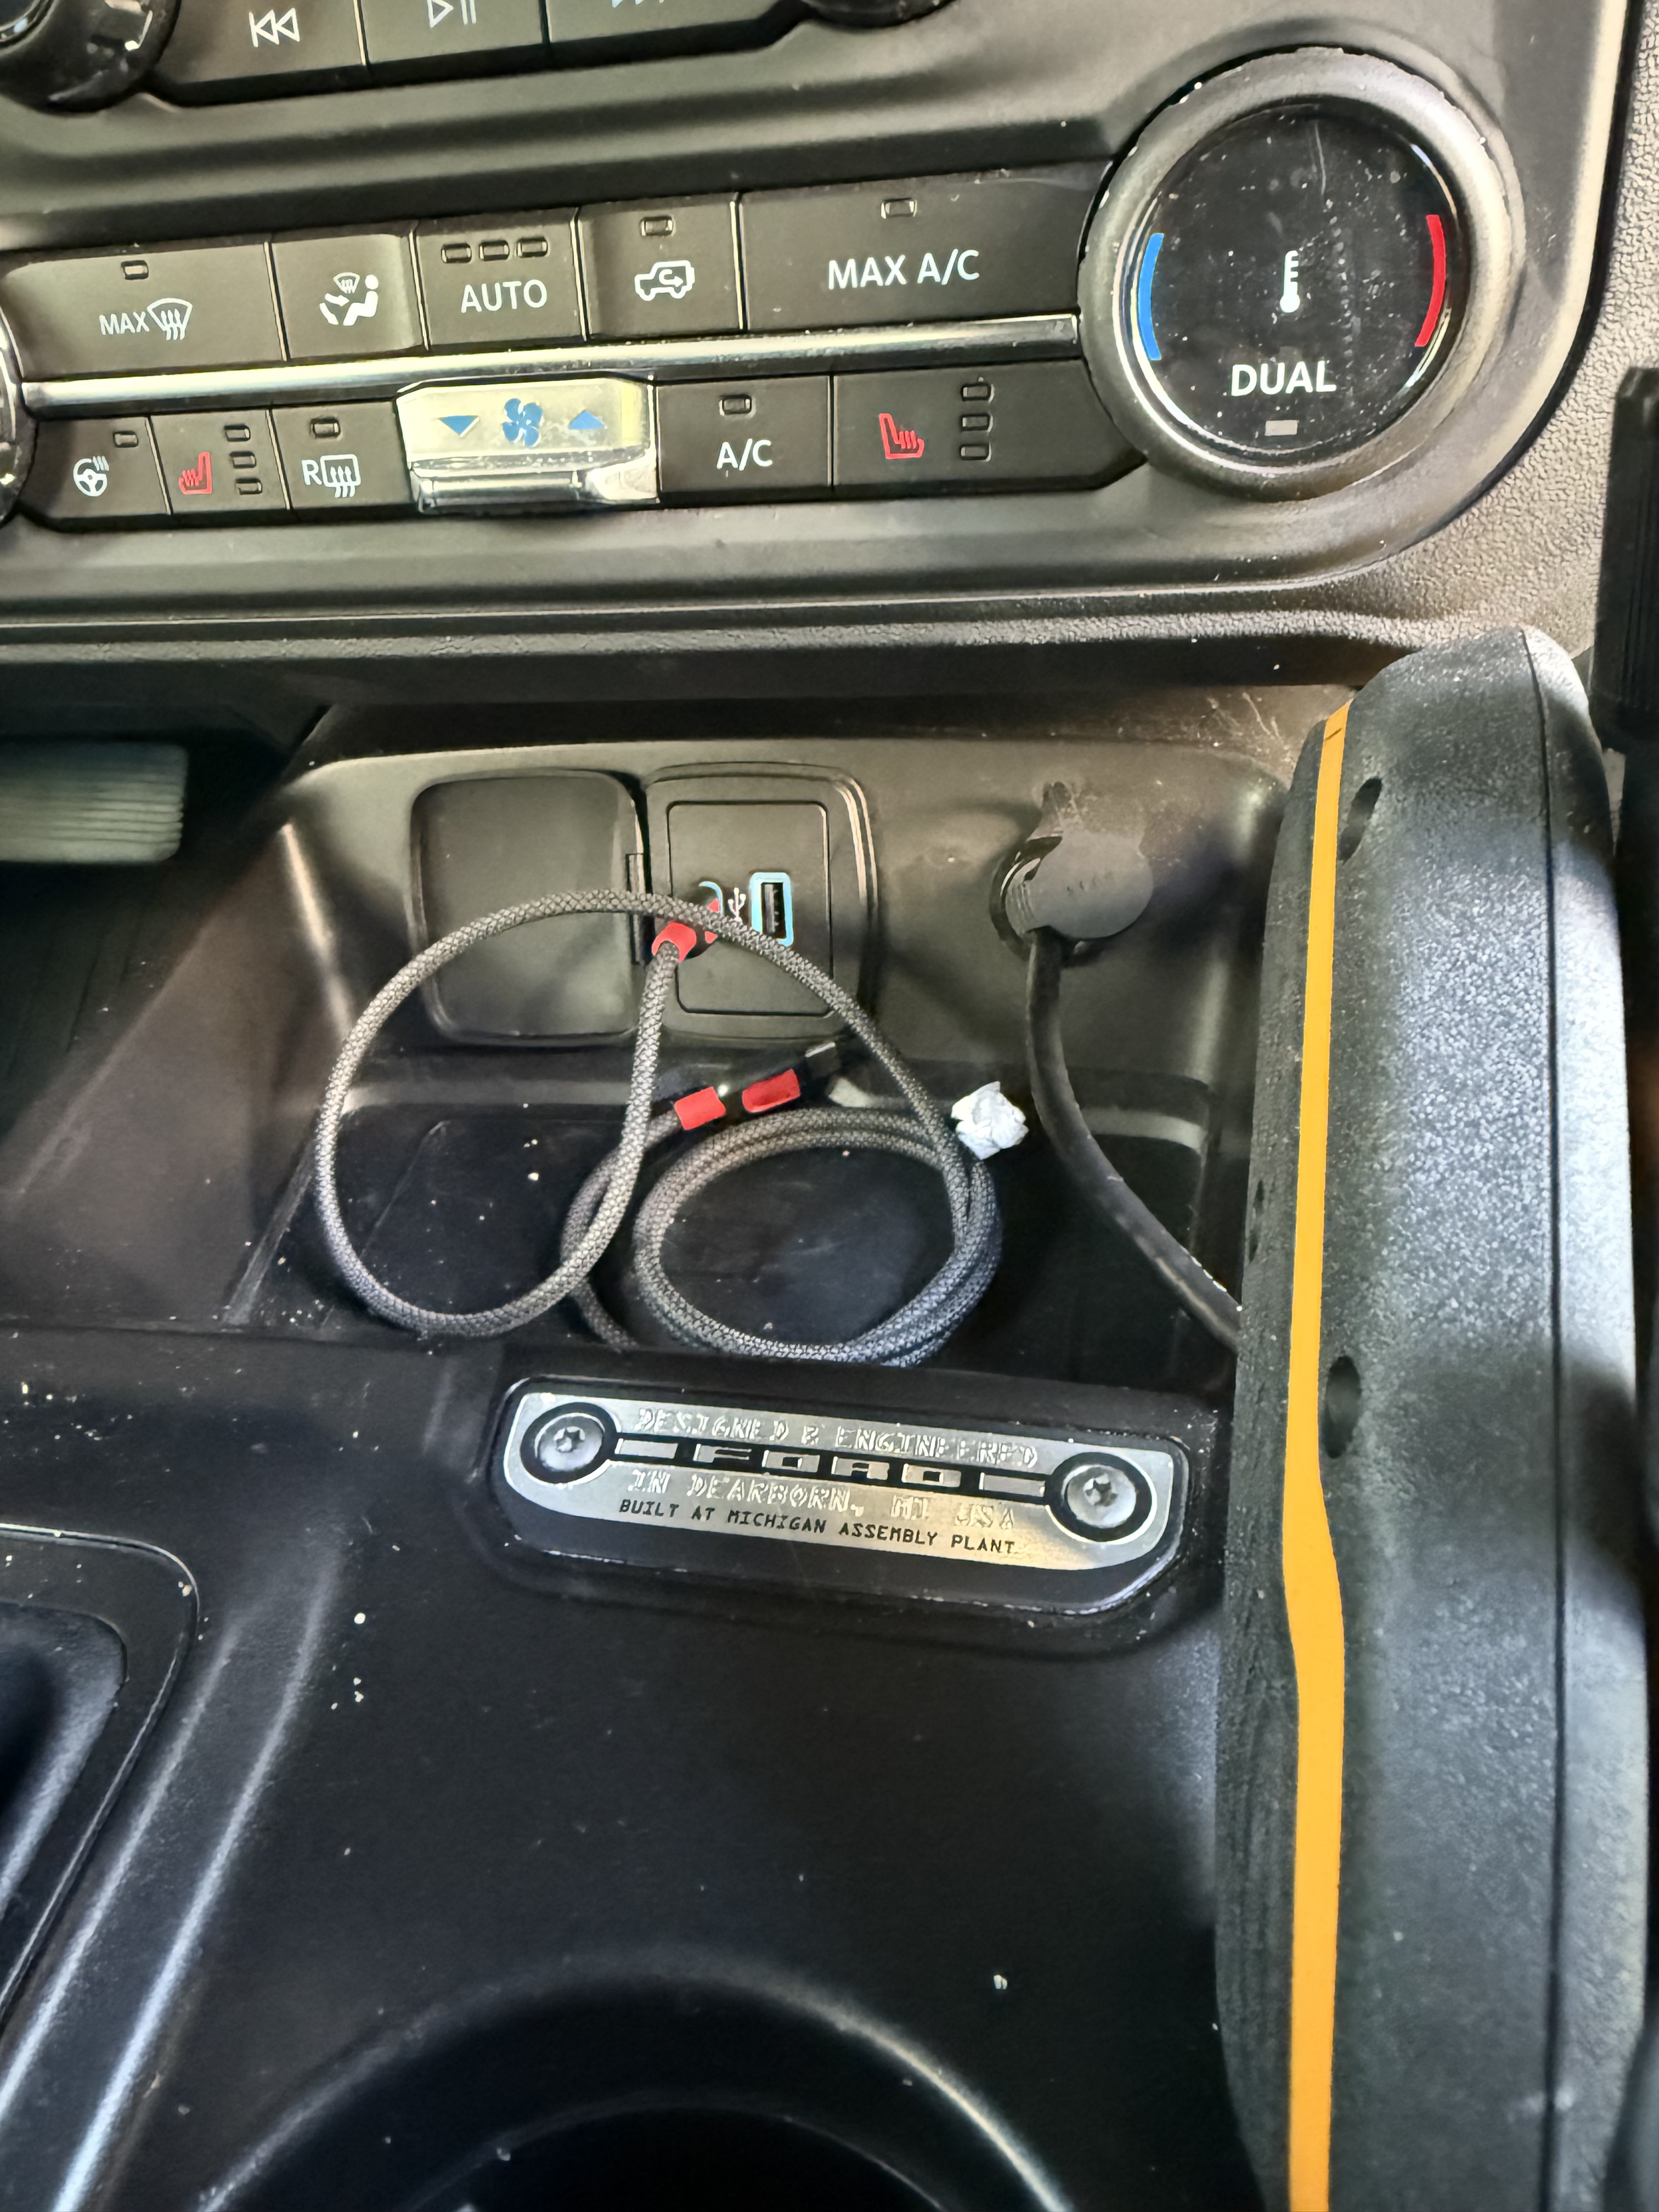
The Disconnect Trick: Instead of running the Yaesu control head extension cable loosely across the console, I routed it behind the dash panel to a hidden RJ45 bulkhead connector embedded flush in the dashboard.
Security Mode: When I leave the vehicle, I can unclip the control head from the Lido mount, unplug the short patch cable from the dash bulkhead, and slide the screen right into the center console lockbox. To a passerby, it looks like a completely stock interior.
Phase 4: The Antenna & No-Drill Fender Mount
For the antenna system, I wanted excellent propagation without drilling holes into the Bronco’s aluminum body panels.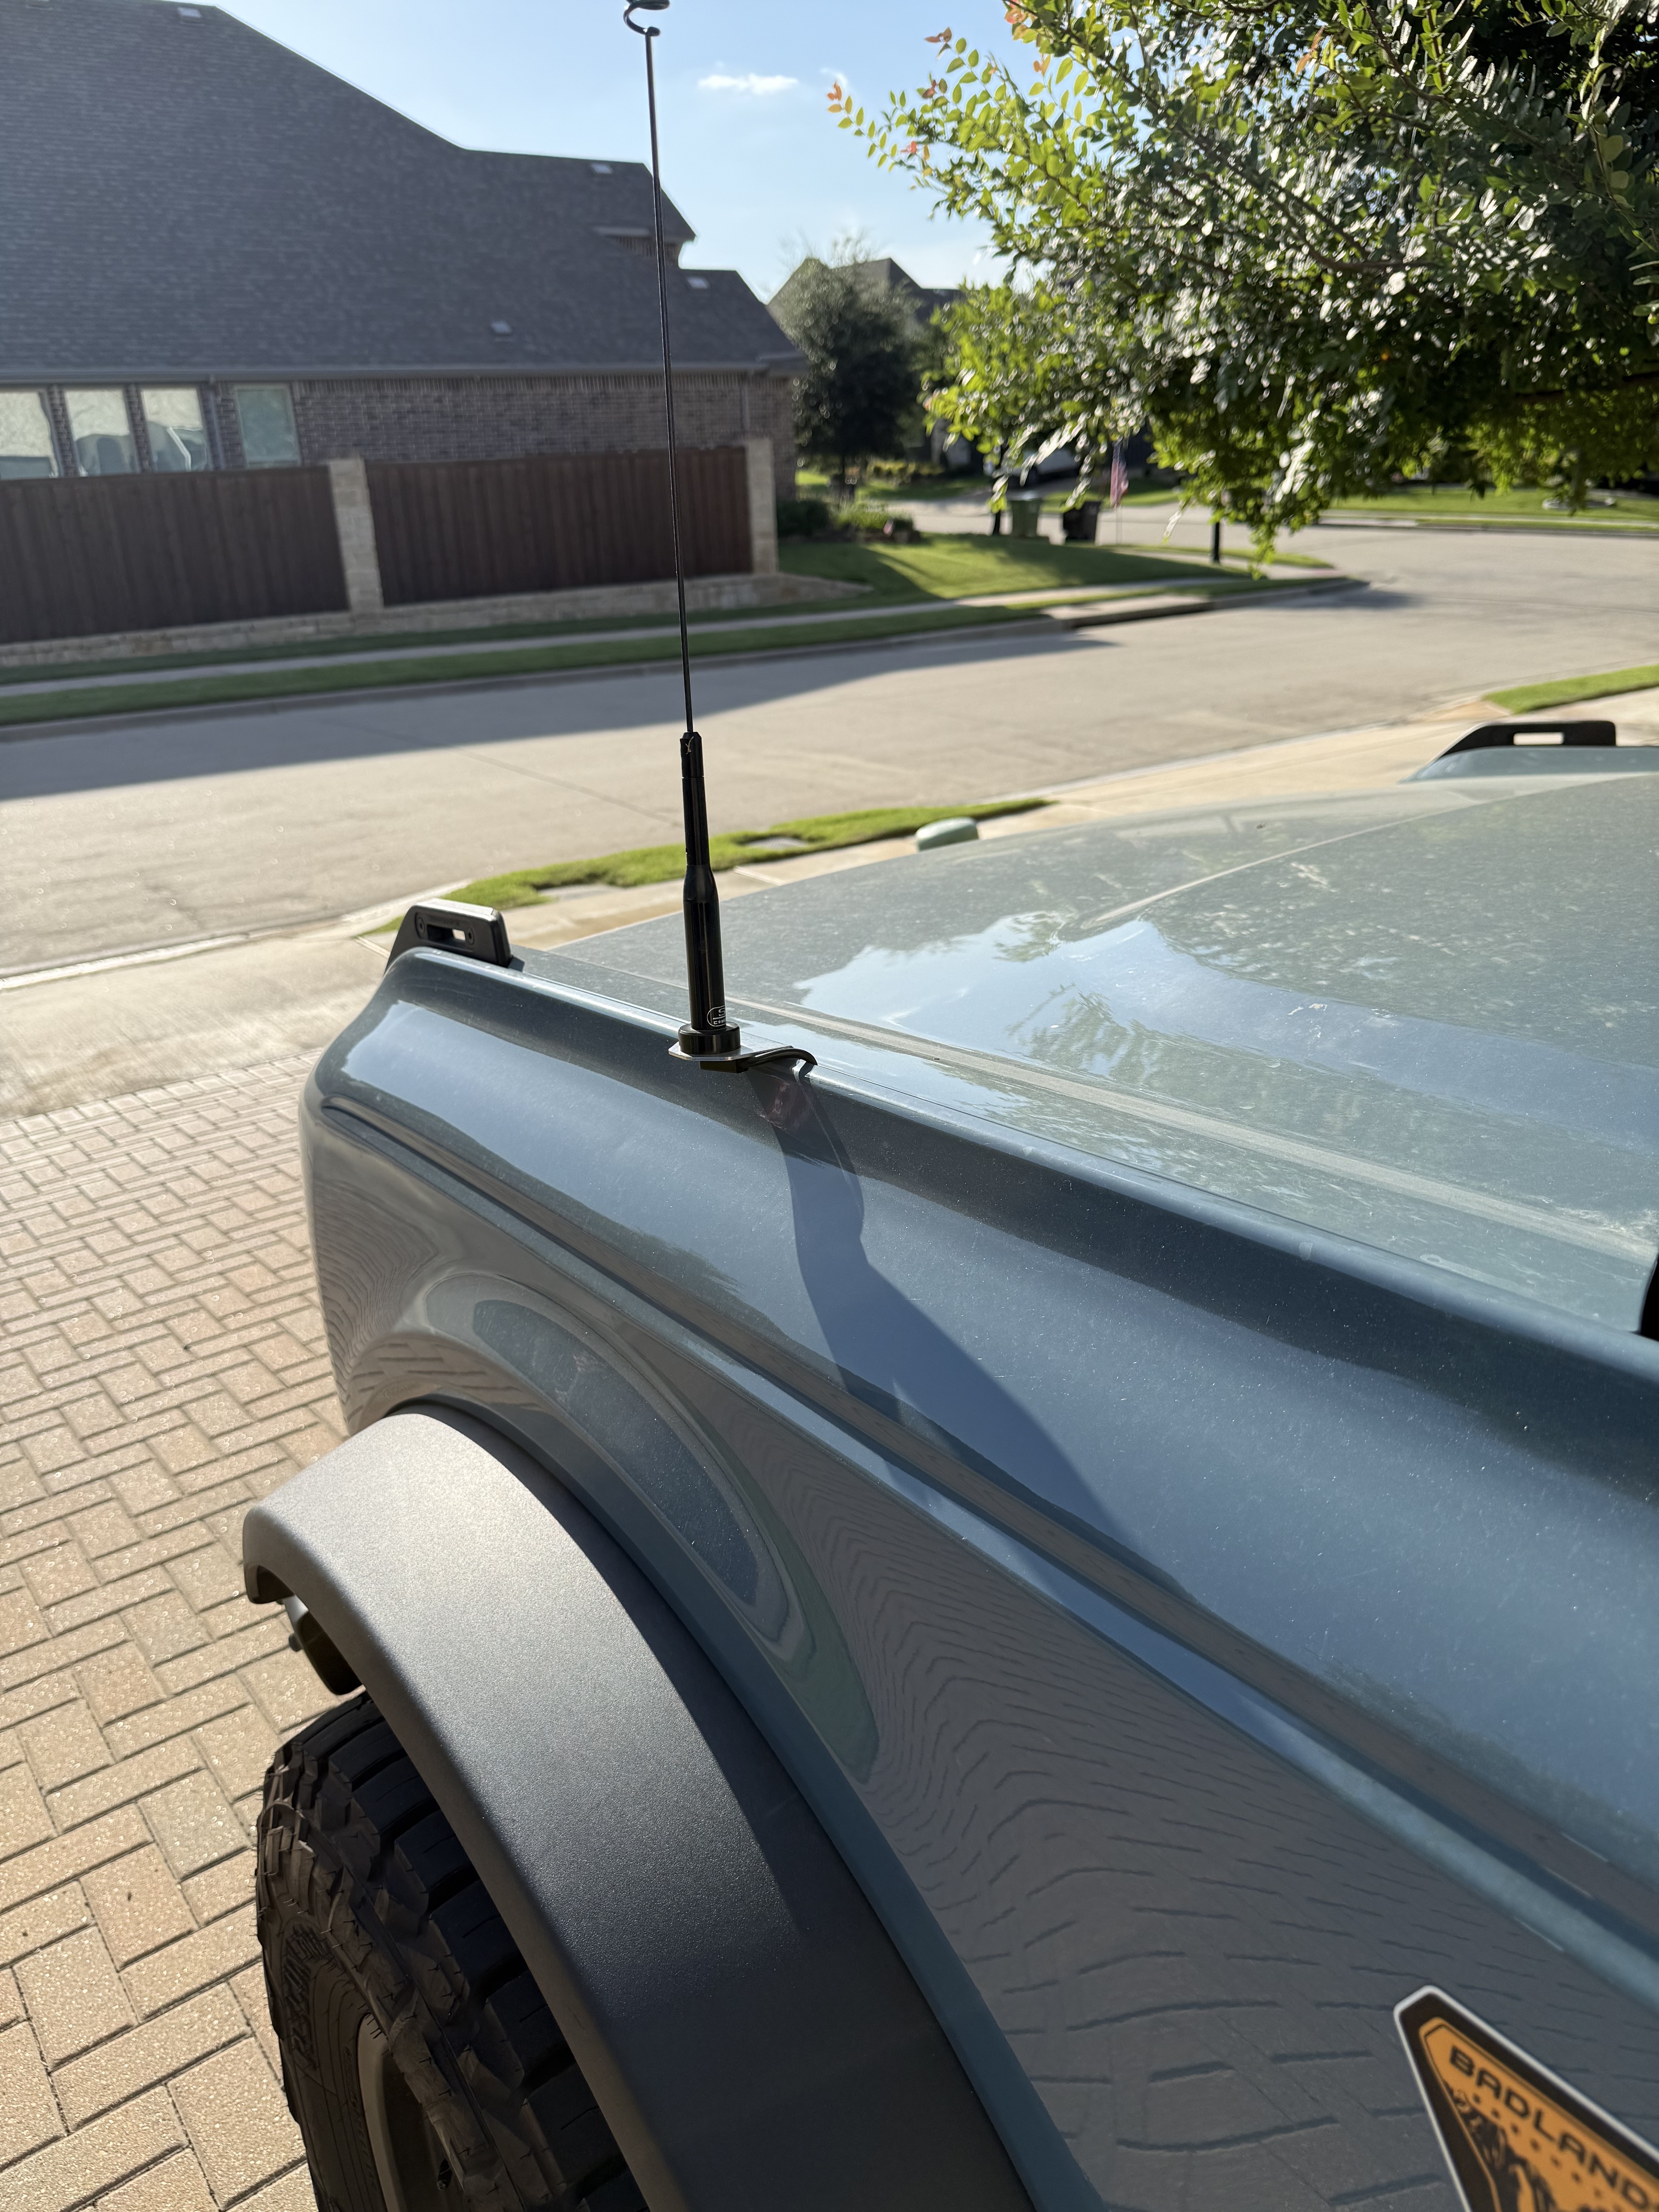
The Mount: I installed a vehicle-specific Fender No-Drill Mount that attaches directly to a factory bolt under the hood line, extending out neatly near the cowl.
The Feedline: The mount utilizes a heavy-duty NMO connector. The RG-58 coax cable sneaks perfectly through the gap between the hood and the plastic cowl, running alongside the power wires through the firewall down to the base unit.
The Antenna: I chose the Comet SBB-5 NMO dual-band antenna. It provides a fantastic balance of gain (3.0 dBi on 2m / 5.5 dBi on 70cm) and flexibility. Because it is a half-wave design on 2 meters, it doesn’t strictly depend on a massive metal ground plane to perform, making it ideal for the Bronco’s unique body layout.
Performance: After firing up the rig, a quick check on the antenna analyzer revealed a stellar SWR of 1.3:1 or less across both bands—perfect for efficient mobile operating!
Wrap Up & Trail Ready!
Total install time took about 8 hours over 2 days (mostly because its hot here in Texas so many water and ac breaks), primarily spent planning the cleanest wire routing paths. The results speak for themselves: I have crisp, clear audio, zero engine noise interference, excellent APRS/GPS satellite acquisition, and a rig that can be locked down in seconds.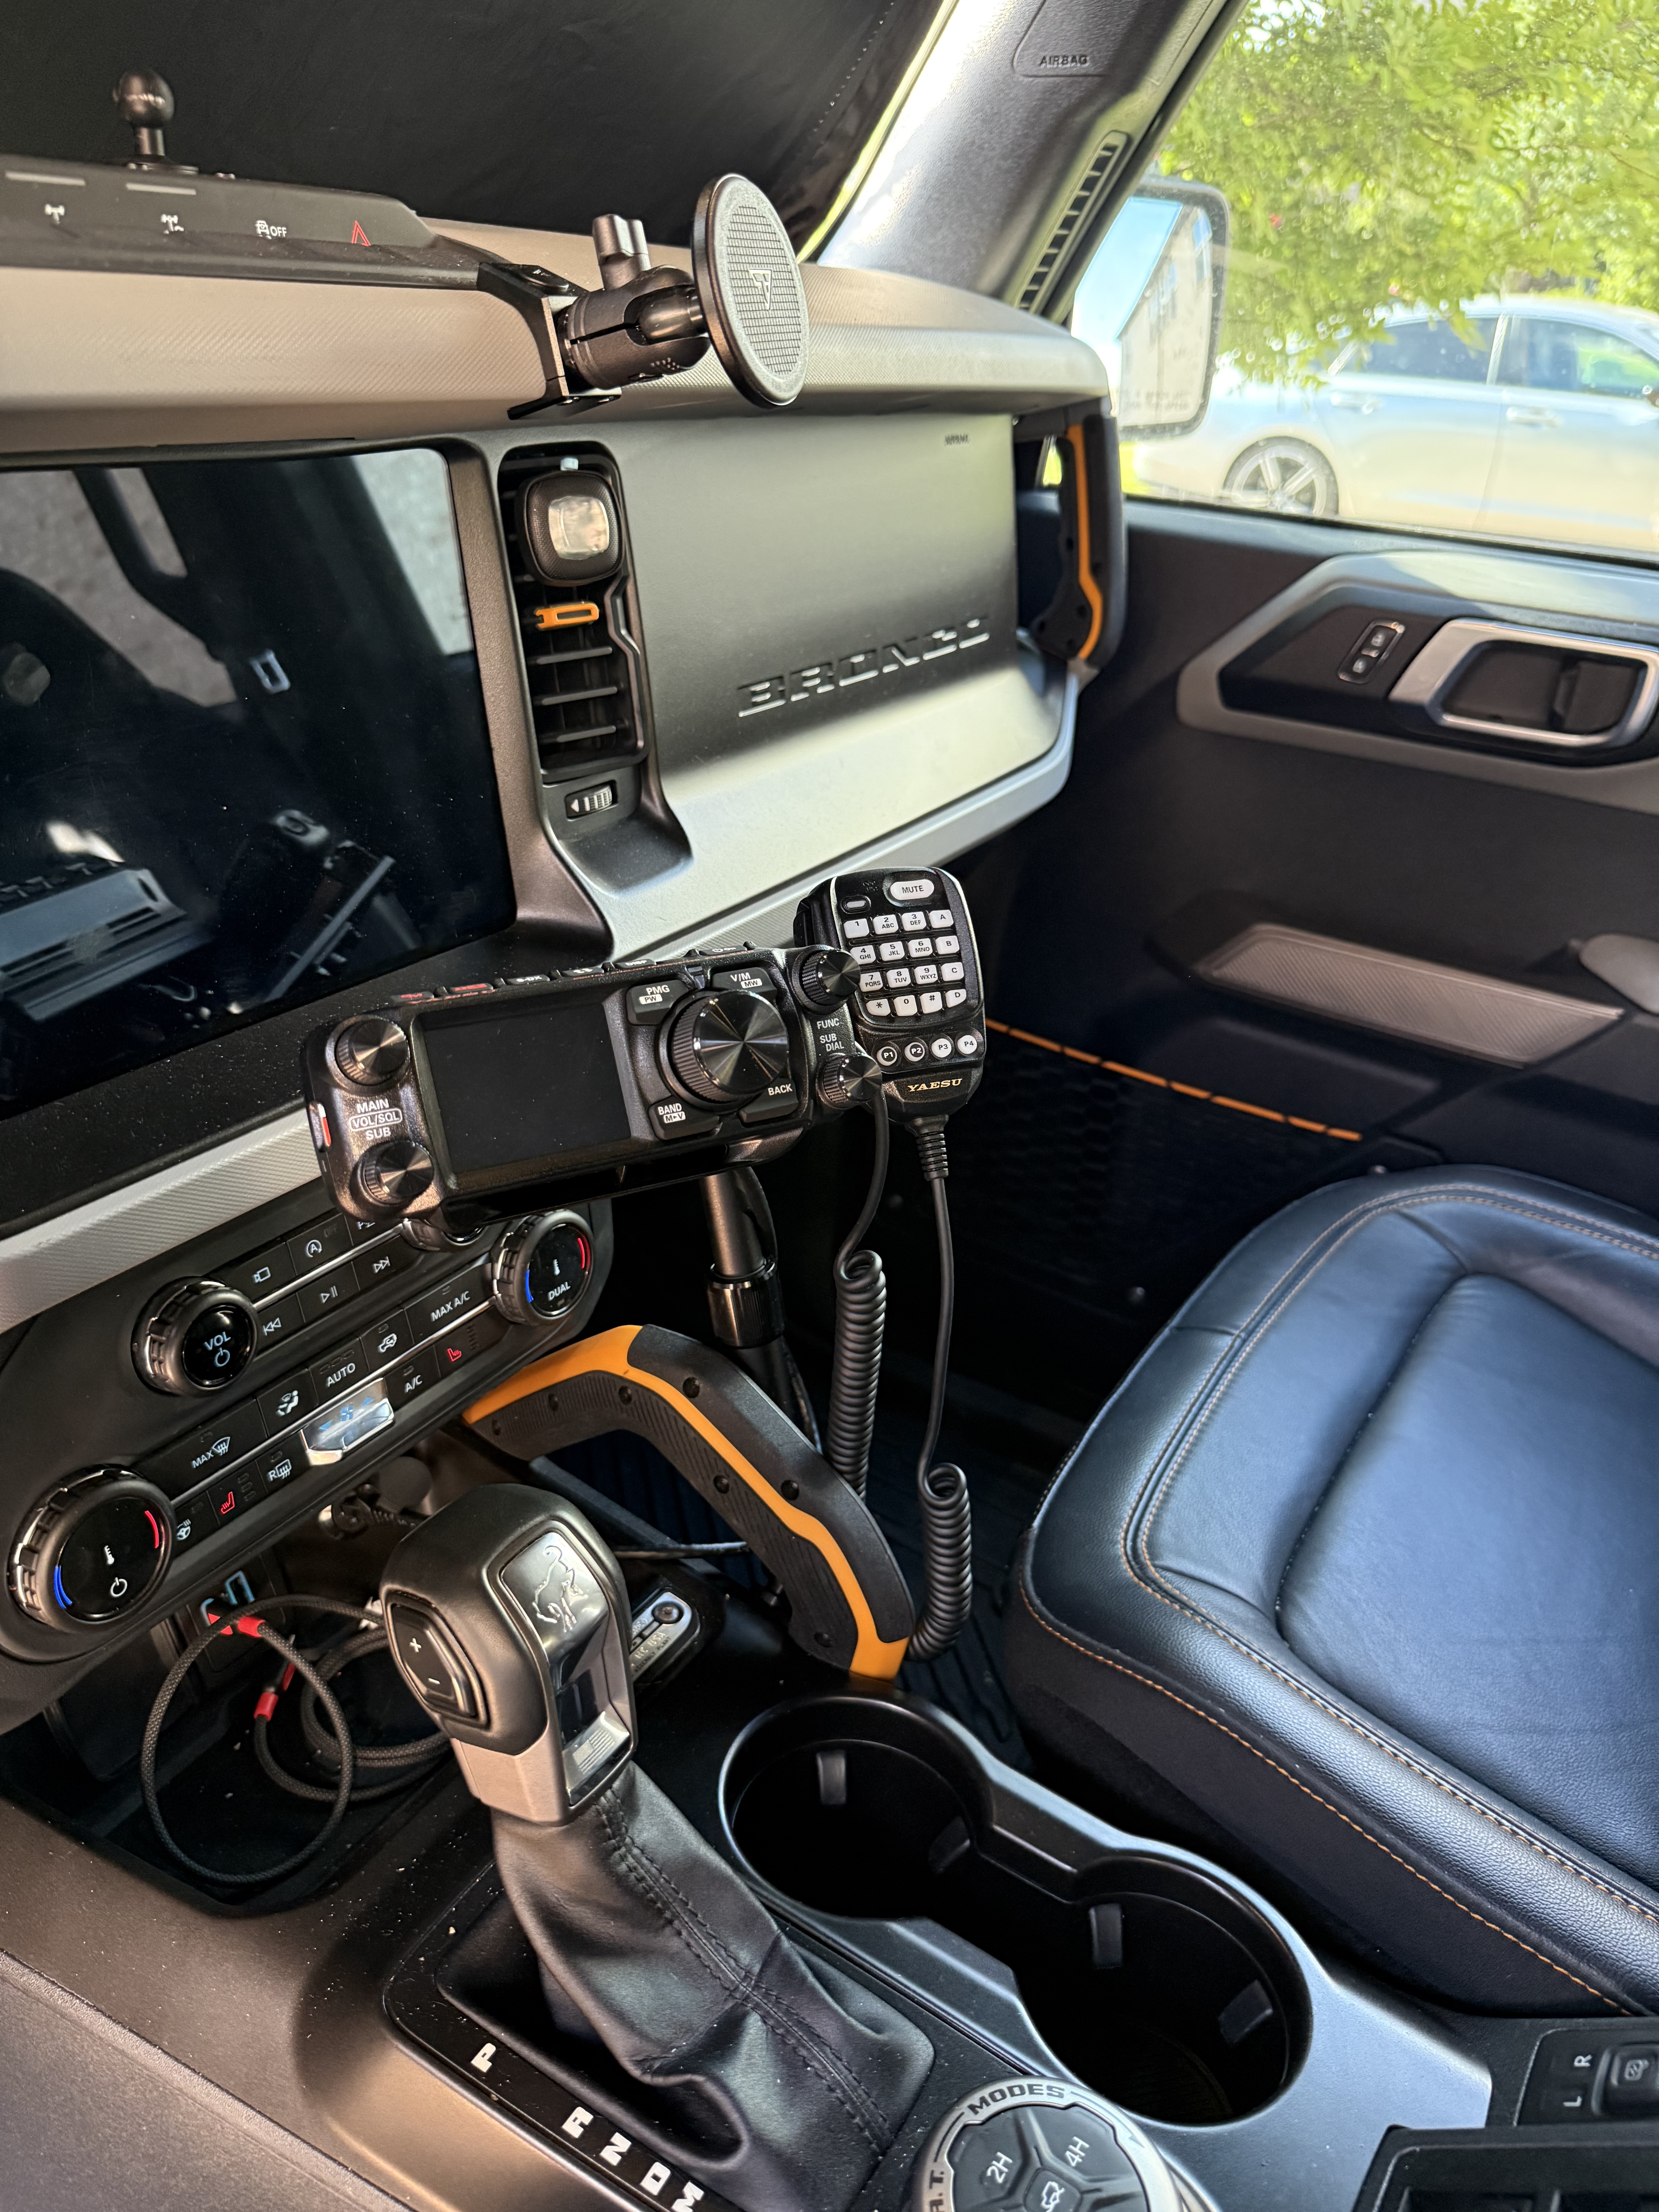
If you are planning an install in your off-road rig or Bronco, don’t be afraid to take your time routing those power lines correctly. Doing it right the first time pays off majorly down the trail.
Have you installed a mobile rig in your truck recently? Drop a comment below or find me on the local repeaters
73, Chris - K5CTW The Ham Radio Lab